


I recently purchased an Intel NUC that I will be installing ESXi 7 on. I decided this would be a great opportunity to create a step-by-step guide on deploying DetectionLab on ESXi.
Hardware
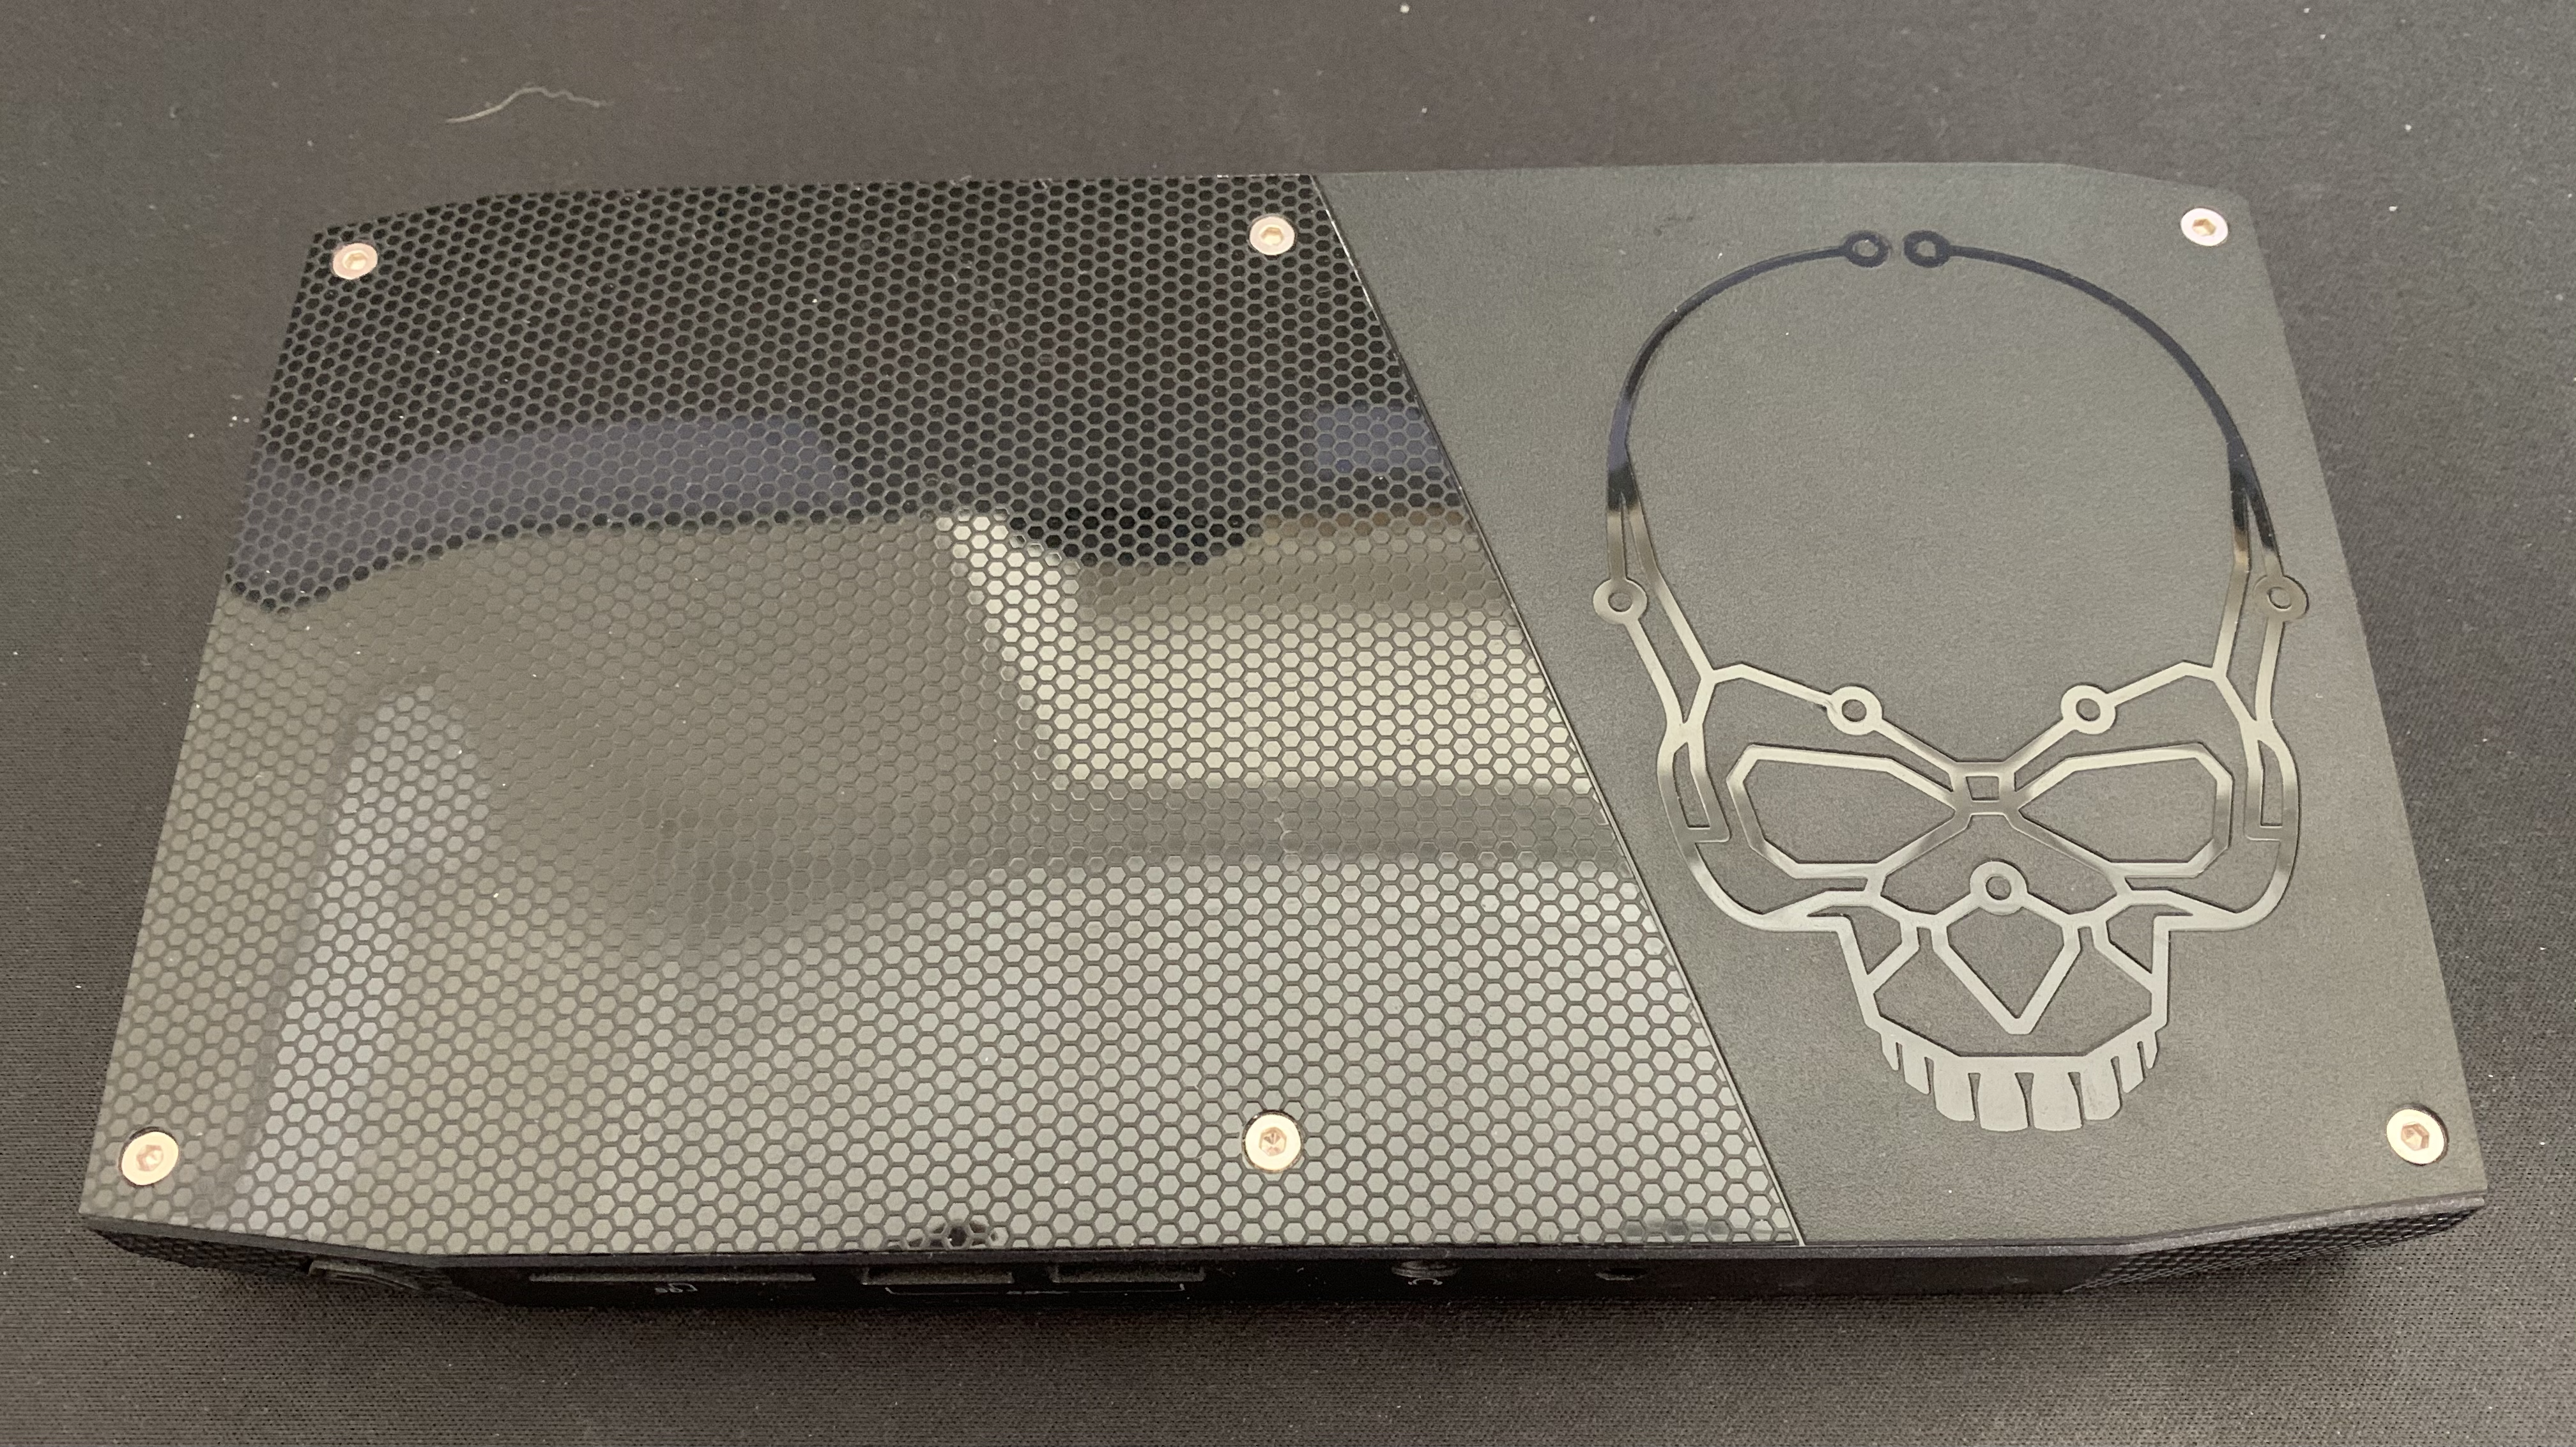
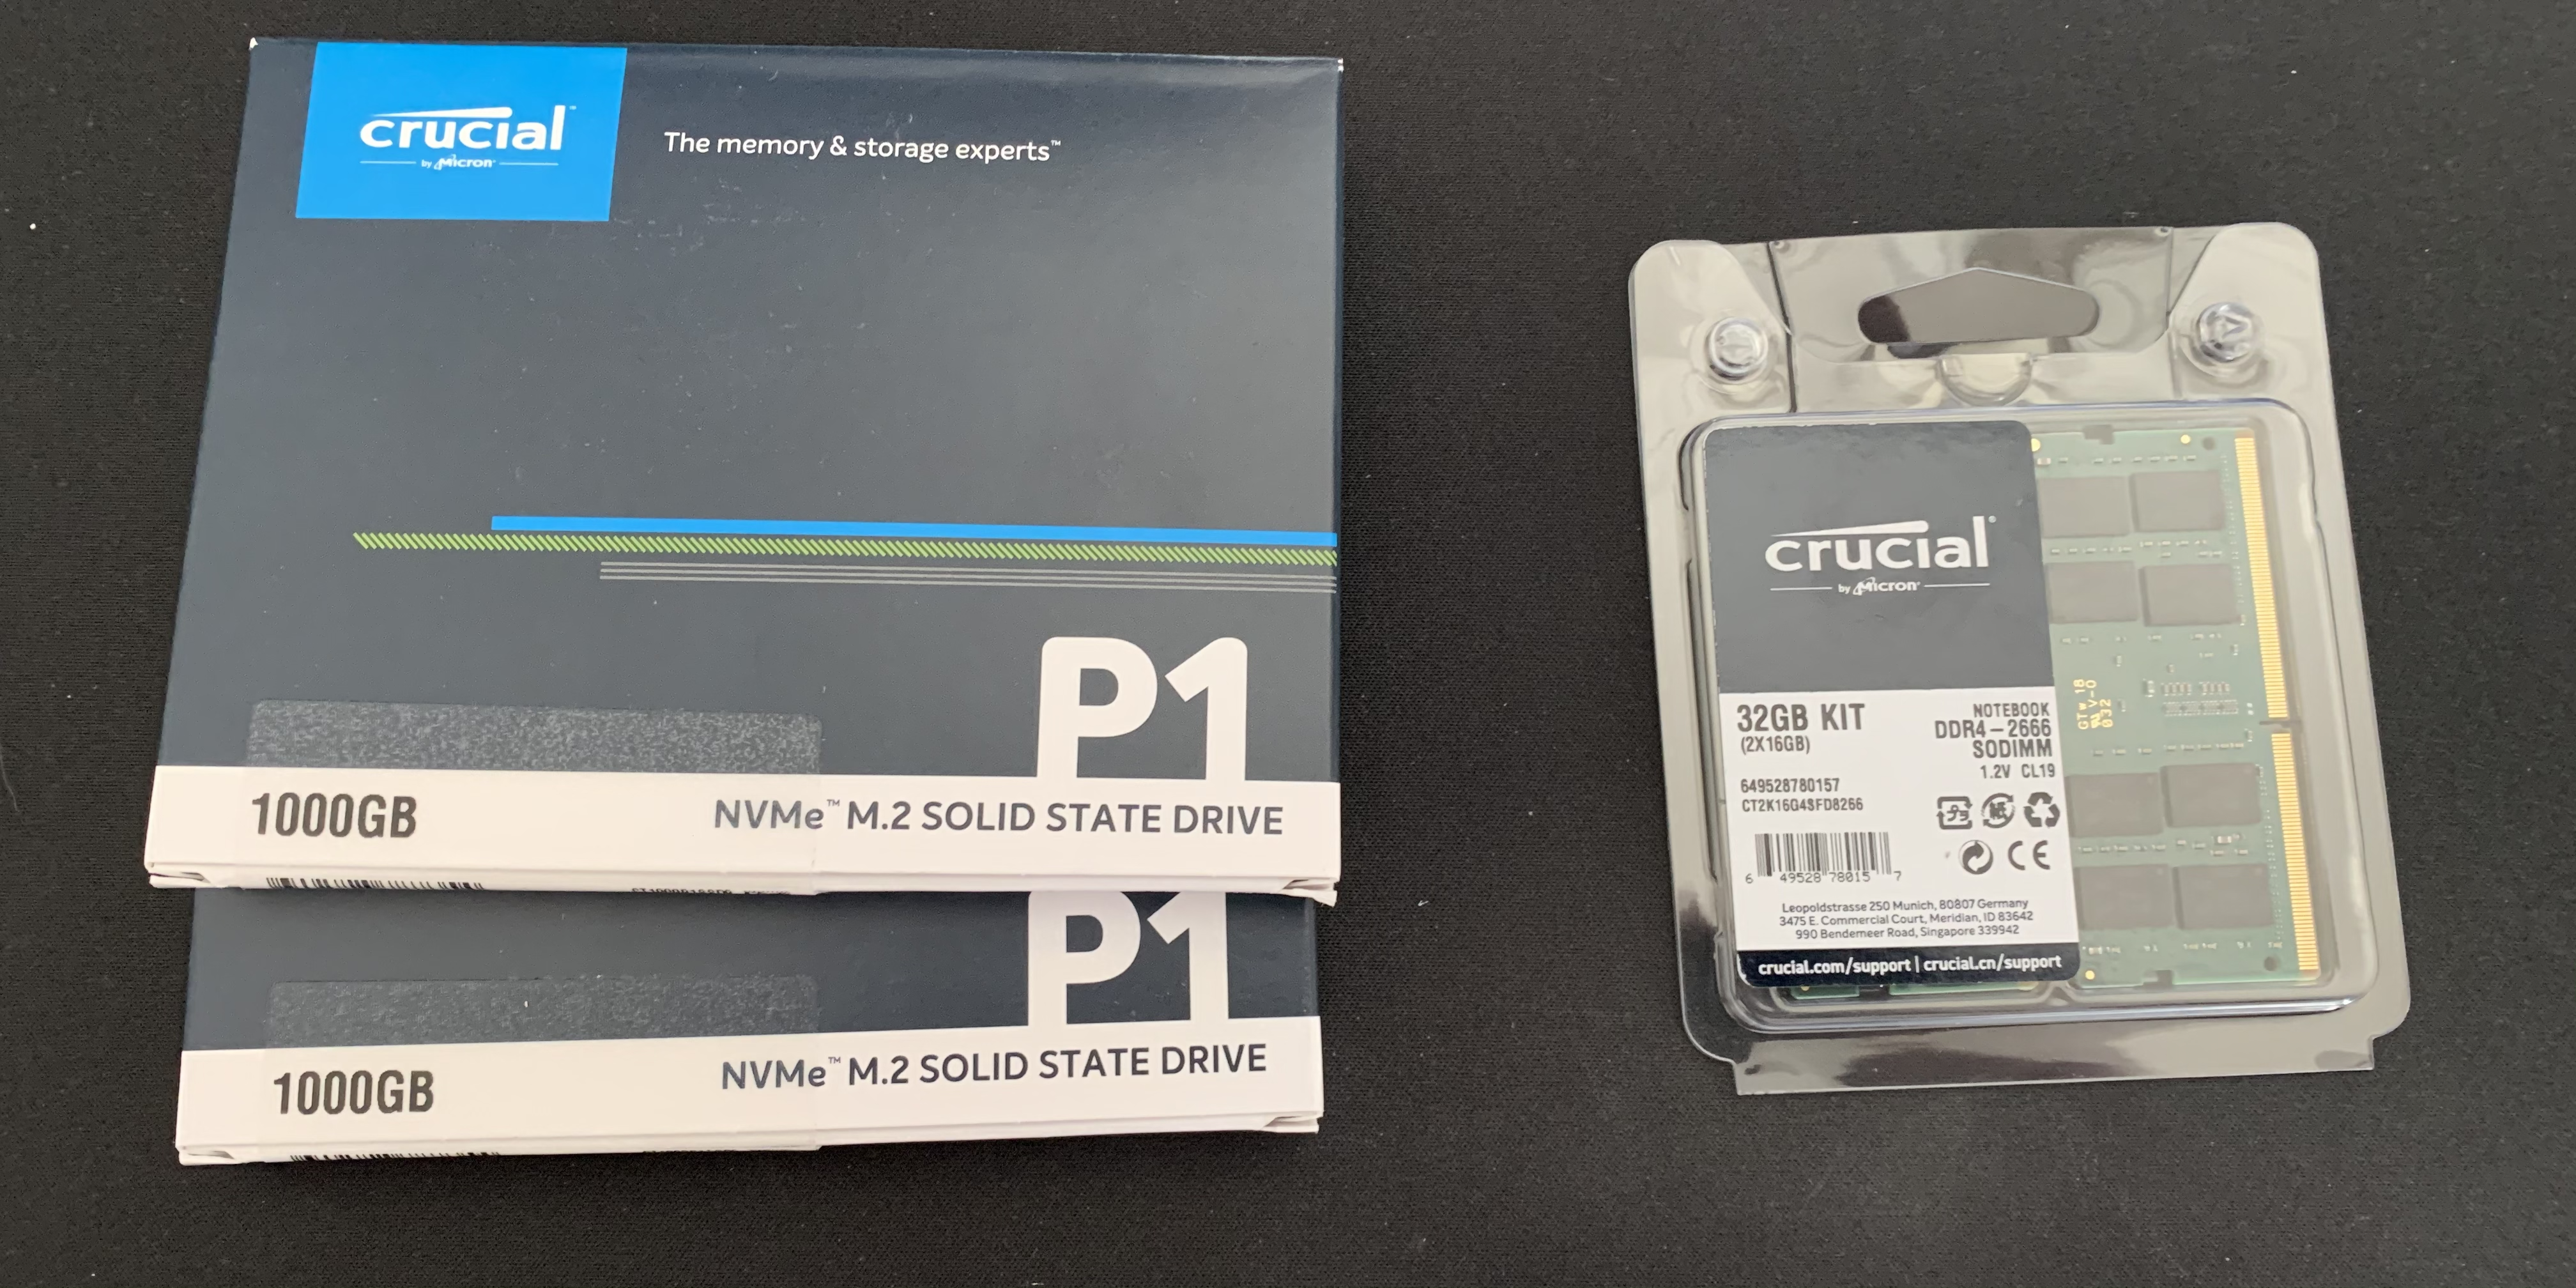
For the hardware, I went with a Skull Canyon i7 NUC. For their size and price point, these things are hard to beat. I found a used one on eBay for $300 and got 2x1TB NVME drives and 32GB of RAM for an additional $300 bringing the total to $600. You can likely build a machine with more RAM/CPU for that price, but almost certainly not in such a quiet and compact case.

Software
The next step is to register an account on VMware (if you don’t already have one) and register to get a free ESXi license: https://www.vmware.com/go/get-free-esxi
From the “License and Download tab”, you’ll get a free license key and have the ability to download the ESXi .ISOs.
I used this guide to create a bootable USB: https://virtuallywired.io/2020/08/01/create-a-bootable-esxi-7-usb-installer-on-macos/
Once the bootable USB was created, I plugged it into the NUC and installed ESXi on one of the NVME drives.
Because I have two NVME drives, I then logged into the web console on the ESXi host and created another datastore using the other drive:

Next, navigate to https://<your_esxi_ip_here>/ui/#/host/manage/services and set the policy for SSH to “start and stop with host” and be sure to manually start the service as well.
To configure the networking:
- Navigate to https://<your_esxi_ip_here>/ui/#/host/networking/vswitches and create a new standard virtual switch named “HostOnly vSwitch”.
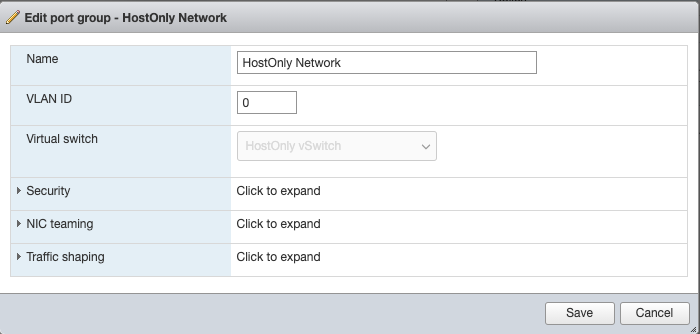
- Navigate to https://<your_esxi_ip_here>/ui/#/host/networking/portgroups and create a new portgroup with the virtual switch set as “HostOnly vSwitch”
Now, SSH to your ESXi host as root and run esxcli system settings advanced set -o /Net/GuestIPHack -i 1. This allows Packer to infer the guest IP from ESXi, without the VM needing to report it itself.
Next, download and install OVFTool: https://code.vmware.com/web/tool/4.4.0/ovf
MacOS
I’m starting from a 100% fresh MacOS install (10.15.7 VM), therefore some of these steps may be redundant for you.
Install Software Prereqs:
- Install Homebrew:
/bin/bash -c "$(curl -fsSL https://raw.githubusercontent.com/Homebrew/install/master/install.sh)" - Install vagrant, packer, and terraform:
brew cask install vagrant && brew tap hashicorp/tap && brew install hashicorp/tap/packer hashicorp/tap/terraform - Install ansible and make sure it’s in your PATH along with OVFTool:
pip3 install ansible --user && echo 'export PATH="/usr/local/bin:$PATH:/Users/$USER/Library/Python/3.8/bin:/Applications/VMware OVF Tool/" >> ~/.bash_profile && source ~/.bash_profile(Or create a virtualenv for this, your call) - Install pywinrm:
pip3 install pywinrm --user(or install this into a virtualenv) - Git clone DetectionLab:
mkdir ~/code && cd ~/code && git clone https://github.com/clong/DetectionLab.git - Thanks to Terraform 0.13, we no longer have to manually download and build the ESXi Terraform Provider: https://github.com/josenk/terraform-provider-esxi#how-to-install
- To use password auth with Ansible, we need to install sshpass. Brew won’t let you install it by default because it lets users do dumb things, but we don’t care for the purposes of a lab environment. You can install via
brew install hudochenkov/sshpass/sshpass - Lastly, to avoid a bug with Ansible, we’re going to set an environment variable:
echo 'export OBJC_DISABLE_INITIALIZE_FORK_SAFETY=YES' >> ~/.bash_profile
Edit Configuration Files
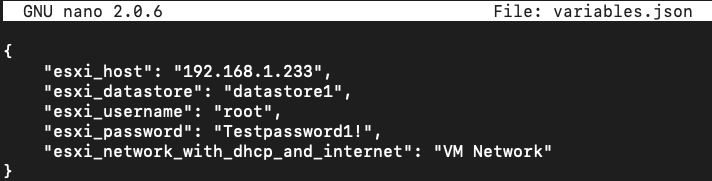
- Inside of DetectionLab/ESXi/Packer/, edit
variables.jsonto match your environment.
- For ESXi 7, we need to edit these 3 .json files
- DetectionLab/ESXi/Packer/windows_10_esxi.json
- DetectionLab/ESXi/Packer/windows_2016_esxi.json
- DetectionLab/ESXi/Packer/ubuntu1804_esxi.json
and add the following directives to each file:
"vnc_over_websocket": true,
"insecure_connection": true,
- In 3 separate terminal windows from the DetectionLab/ESXi/Packer directory, run the following commands to create the Packer images in parallel:
PACKER_CACHE_DIR=../../Packer/packer_cache packer build -var-file variables.json windows_10_esxi.jsonPACKER_CACHE_DIR=../../Packer/packer_cache packer build -var-file variables.json windows_2016_esxi.jsonPACKER_CACHE_DIR=../../Packer/packer_cache packer build -var-file variables.json ubuntu1804_esxi.json
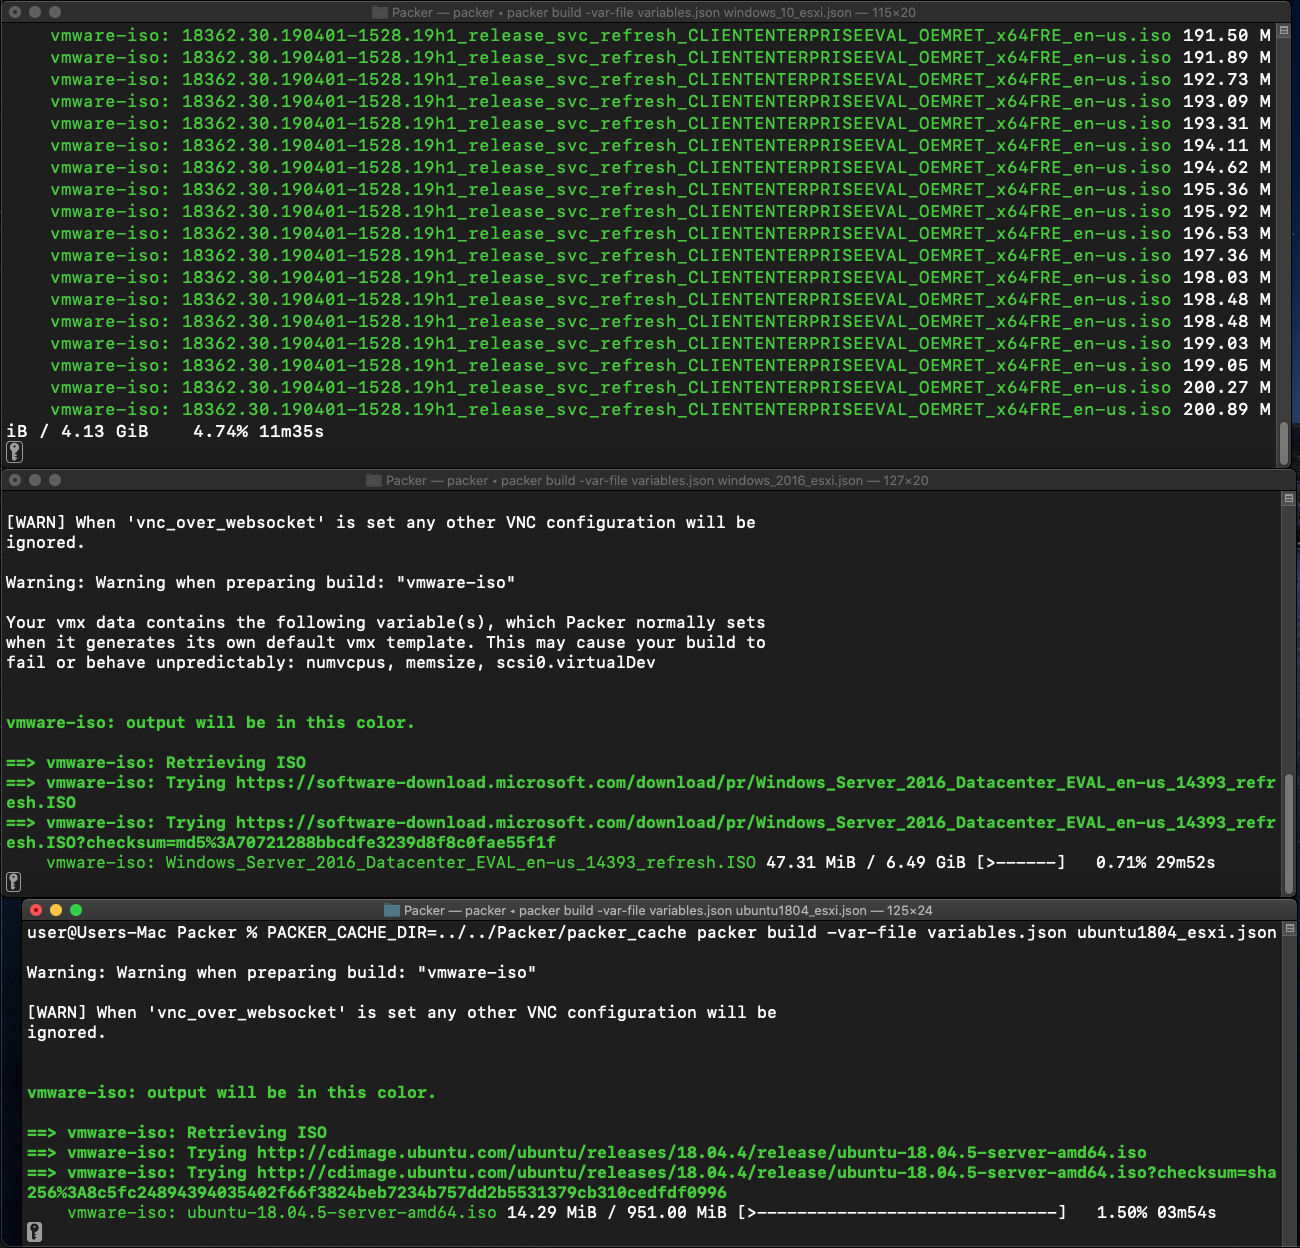
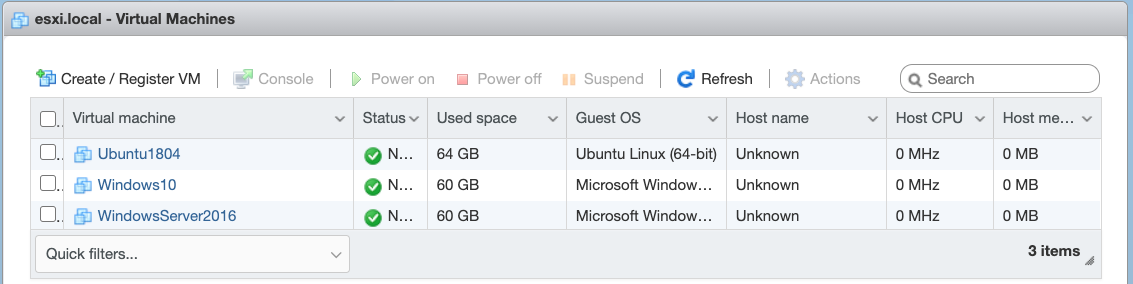
What we’re doing in this step is creating 3 VMs: Ubuntu, Windows 10, and Windows 2016. Each time we want to destroy and create VMs for DetectionLab in ESXi, ESXi will use these Packer VMs as “base” VMs.
When this step finishes, you should have 3 new VMs in ESXi:
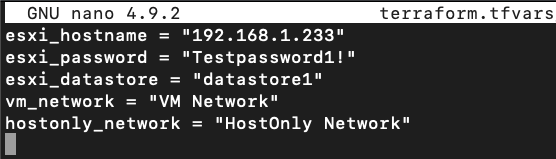
- Instead of editoing
DetectionLab/ESXi/variables.tfdirectly, we’re going to create a file namedvariables.tfvarsto override any variables from that file where the default value doesn’t match our configuration:
- After that, run
terraform initand the ESXi provider plugin should be installed automatically:
$ terraform init

Initializing the backend...

Initializing provider plugins...
- Finding josenk/esxi versions matching "1.8.0"...
- Installing josenk/esxi v1.8.0...
- Installed josenk/esxi v1.8.0 (self-signed, key ID A3C2BB2C490C3920)

Partner and community providers are signed by their developers.
If you'd like to know more about provider signing, you can read about it here:
https://www.terraform.io/docs/plugins/signing.html

Terraform has been successfully initialized!
- Running
terraform applyshould then prompt us to create the logger, dc, wef, and win10 instances.
$ terraform apply
<snip>
Plan: 4 to add, 0 to change, 0 to destroy.

Do you want to perform these actions?
  Terraform will perform the actions described above.
  Only 'yes' will be accepted to approve.
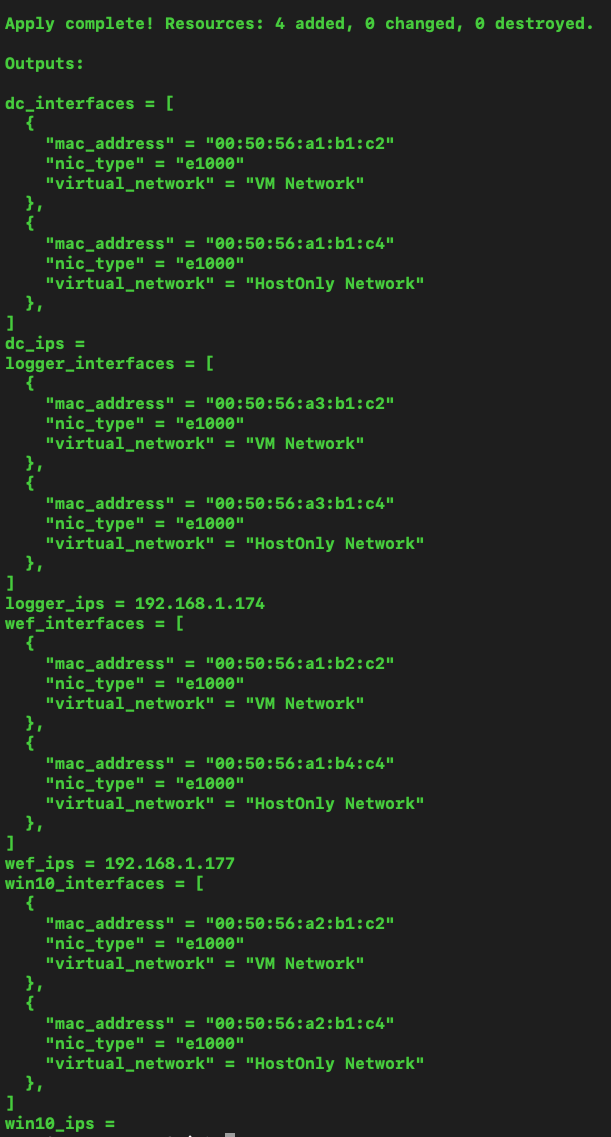
Once finished, you should see something like the following:
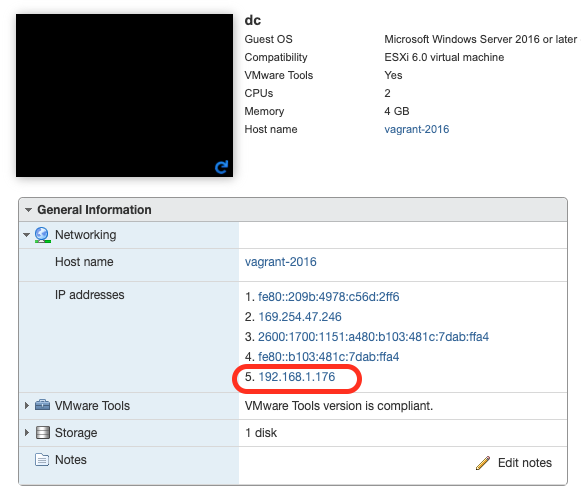
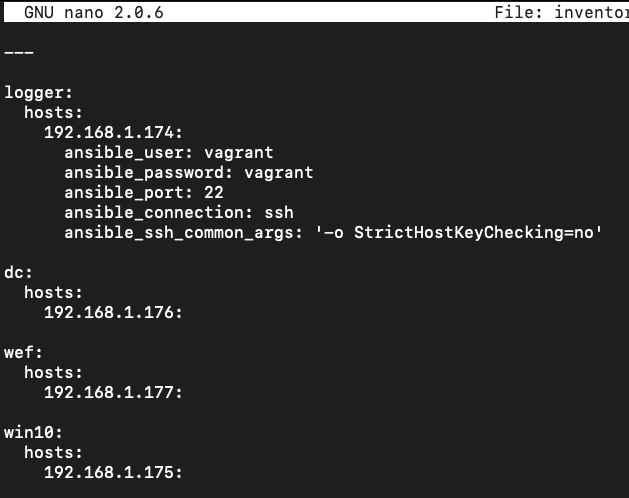
- At this point in time, the DetectionLab VMs exist but have not been provisioned. First, we need to determine the IP address of each host and edit the
ESXi/ansible/inventory.ymlfile. At times, Terraform is unable to dervice the IP address of hosts, so you may have to log into the ESXi console to find that information and then enter the IP addresses intoinventory.yml:
-
At this point in time, I highly recommend creating snapshots of your VMs. This way, if there is an issue with provisioning or you want to quickly restore the VM, all you have to do is restore the snapshot and re-provision using Ansible.
-
Lastly,
cdtoDetectionLab/ESXi/ansibleand runansible-playbook -v detectionlab.yml. This will provision the hosts one by one using Ansible. If you’d like to provision each host individually in parallel, you can useansible-playbook -v detectionlab.yml --tags "[logger|dc|wef|win10]"and run each in a separate terminal tab.
Note: Depending on the names of your network interfaces that get created in Windows (e.g. Ethernet1, Ethernet2, Ethernet0 2), you may have to modify the ansible role files in DetectionLab/ESXi/roles/[dc|wef|win10]/tasks/main.yml and update the Set HostOnly IP Address and Set DNS Address task commands.
ESXi DetectionLab Management
Once the Ansible provisioning completes, you should have a completely provisioned DetectionLab running on ESXi. Here’s a quick guide of how to manage things:
Re-create a single VM (e.g. logger, dc, etc)
From DetectionLab/ESXi run terraform taint esxi_guest.<hostname> && terraform apply. Once completed, run cd DetectionLab/ESXi/ansible && ansible-playbook -v detectionlab.yml --tags "<hostname>"
Re-create the entire lab (all 4 instances)
From DetectionLab/ESXi run terraform destroy. After it fininshes, run cd DetectionLab/ESXi/ansible && ansible-playbook -v detectionlab.yml
Share this post
Twitter
Facebook
Reddit
LinkedIn